![]()
![]()
Cut, Copy And Paste
|
|
|
These three commands (all located on the Note that the default shortcut keys for these commands are the same as in most Windows programs: Ctrl+x for Cut, Ctrl+c for Copy and Ctrl+v for Paste. You may have noticed the fantastic possibilities of dynamic key bindings in Gimp. If you don't like the default settings, you can choose any shortcut key you like for a certain command by simply typing the new shortcut in the menu! Read more about it in "Default Shortcuts And Dynamic Key Bindings" starting on page 9. Paste Into
Cut, Copy And Paste NamedYou're probably accustomed to being able to cut/copy and paste only one image at a time. In other words, as soon as you copy or cut something new, the old copy will be replaced by the new one. Cut Named, Copy Named and Paste Named allow you to use a buffer that can hold a great number of cut images. If you're repetitively cutting/copying and pasting a lot of images, this is an extremely convenient feature. Select an image or part of an image that you want to cut or copy. Select the command When you want to paste one of the selections you have named and put in the named buffer, choose |
|

|
|

|
Note: The named buffer only exists as long as your Gimp session. If you want to save a selection more permanently, you need to save it in a separate layer in your image. The option Replace Current Selection allows you to replace a non-floating selection in the image with a selection from your list. Replace Current Selection unchecked gives the same result as Paste Into, if you already have a selection in the image. If you try to use this option with a floating selection, the float will be anchored to the image. The selection from your list will turn into a new float in the same place as the old one. You can also delete a selection from the list if you no longer need it. |

|
|
Paste As New Image |
|

|
This is a very useful function. When you apply If your image has several layers, all layers present within the selection will be copied into the new image (small layers outside the section will not be copied). All layer information such as visible layers, grouped layers, layer masks and alpha channels will also be copied to the new image. To learn more about layers read "Layers And Floating Selections" starting on page 315. Copy Visible
|
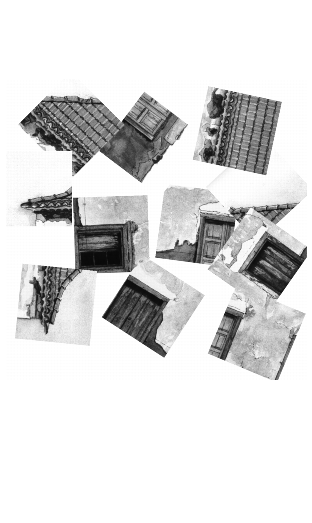
Multiselect
|
|

|
The |
|
|
|
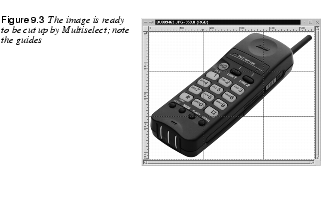
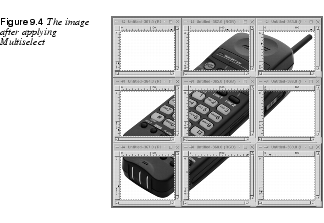
When you apply the Multiselect command, the sections indicated by the guides will be selected and copied into new images. As with the Paste as New Image function, all layers and layer attributes are also copied. A layered image cannot be save as a JPEG file, so if you are designing for the Web, we recommend that you flatten the image (merge all layers) before applying Multiselect. This saves you the trouble of flattening all of the small Multiselect images separately. |
|
|
|
Clear, Fill And Stroke
|
|
Clear
Fill
Stroke
|
|

|
|
Zoom
|
|
|
|
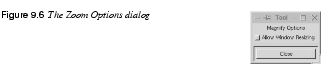
If the Magnify tool is active, you can click in an image to zoom in, and Shift+click to zoom out. To zoom a specific part of the image, drag diagonally across that part (draw a rectangle), and release the mouse button. You can also pan a zoomed image by clicking and dragging on the image with the middle mouse button. Even if the Magnify tool is not active, you can zoom with the The Pressing - zooms in smaller steps than zooming using the scales. In other words, to display your image in a scale of 1:3, press - three times. Magnify OptionsAllow Window Resizing means that the canvas size will always adapt to the amount of zoom you use, so you'll always be able to see the entire image regardless of zoom level. If you don't want to use this option, you can press Ctrl+e for Shrink Wrap, which will also adjust the canvas to the image size. |
|
|
Rulers And Guides
|
|
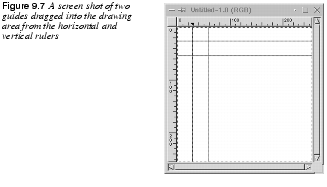
RulersAt the top and left sides of the image frame, you'll see the Gimp rulers. As you drag the cursor over an image, a horizontal and a vertical arrow will appear inside the rulers, showing the current cursor position. In Gimp, all images are measured in pixels by default, so the ruler unit is pixels. You can change the ruler unit to millimeters or inches by editing your However, there is not much point in doing so, because in Gimp v.1.0 you can't set image resolution and canvas size the way you can in Photoshop. Size (and therefore resolution) for a printed image is determined by the Print dialog or Save as (Postscript) dialog (see Printing Images and PostScript And EPS). The reason for this is that Gimp is hard coded to handle all images in 72 ppi (dpi) which is the default for things like web images, but is quite insufficient for printing. GuidesHorizontal and vertical guides can be dragged straight from the left or top rulers. You can easily adapt the size, shape and position of a selection to the guides by drawing it within the frame of two vertical and two horizontal guides. You can also use the guides to set the exact point of origin from which you want a selection to start. If you press the |
|
|
|
To change the position of a guide, use the Move tool. Notice how the move cursor symbol changes into a pointing hand when it touches a guide, and that the guides will change color from blue to red when they are touched. |
|
|
Toggle And Snap
If you don't want to use guides and/or rulers, they can be toggled on and off with the | |
Undo And Redo
|
|
|
These options should be self-explanatory. Because you'll use them often, you should learn their keyboard shortcuts by heart. The shortcut for | |
New View, Shrink Wrap And Window Info
|
|
New ViewThe Shrink Wrap
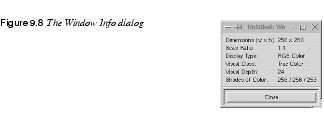
Window InfoThe Window Info dialog ( |
|
|
|
![]()
![]()
| Frozenriver Digital Design http://www.frozenriver.nu Voice: +46 (0)31 474356 Fax: +46 (0)31 493833 support@frozenriver.com |
Publisher Coriolis http://www.coriolis.com |